 Download Netflix videos to MP4 or MKV format in 1080P Full HD resolution.
How to cancel Youtube Music subscription? Looking for a way to keep YouTube Music songs after subscription? Read this post, we will show you how to cancel a YouTube Music subscription on desktop, Android, iPhone, or iPad easily, and the best way to keep YouTube Music after canceling subscription.
“I want to cancel my YouTube Music subscription and do not want to lose my songs. Is there any way to keep YouTube Music after subscription?”
YouTube Music is a widely used music streaming service that offers a free, ad-supported tier accessible through your Google account. For users seeking an enhanced experience, there is YouTube Music Premium, a paid subscription that provides ad-free access to the entire music catalog, offline downloads, and the ability to play music with the screen off. However, to enjoy these additional features, a monthly fee of $9.99 is required.
While YouTube Music Premium is a popular choice, it may not be suitable for everyone. Whether you want to switch to alternative services or reduce your monthly expenses, canceling your subscription is a relatively simple process. In this article, we will guide you through the steps of canceling your YouTube Music Premium subscription. Let’s begin.
CONTENTS
Part 1. Cancel YouTube Music Subscription Using a Desktop Browser
Step 1. Open a web browser and navigate to the YouTube Music player. Log in to your YouTube Music Premium account. Look for the profile picture icon in the upper-right corner and click on it.
Step 2. From the drop-down menu, select “Paid memberships” to access the paid memberships page.
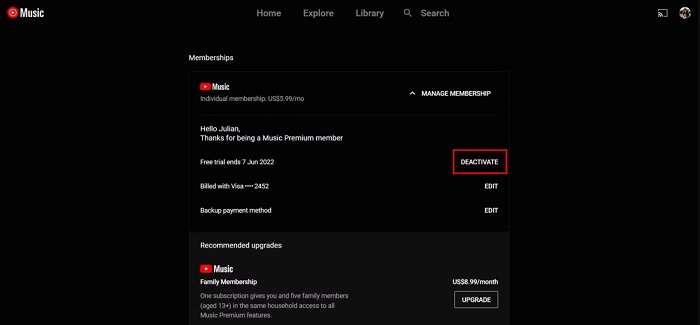
Step 3. Locate the “MANAGE MEMBERSHIP” button next to the details of your YouTube Music subscription. Click on it, then click on the “DEACTIVATE” button next to your next billing date.
Step 4. A “CONTINUE TO CANCEL” button will appear. You can choose to pause your membership instead. If you want to proceed with cancellation, click on “YES, CANCEL.”
After completing these steps, a pop-up confirmation will verify the successful cancellation of your membership. You will continue to enjoy your subscription benefits until the end of your current billing cycle.
Part 2. Cancel YouTube Music Subscription on an Android Device
Step 1. Launch the YouTube Music app on your Android device and sign in to your Premium account.
Step 2. Tap the profile icon located in the top right corner of the app. From the menu that appears, select “Paid memberships.”
Step 3. Your current subscriptions will be displayed. Tap on the membership you wish to cancel. Then, click on the “DEACTIVATE” option next to your next billing date.
Step 4. Tap “CONTINUE TO CANCEL.” Choose the reason for cancellation and tap “NEXT.” Finally, tap “YES, CANCEL” to confirm.
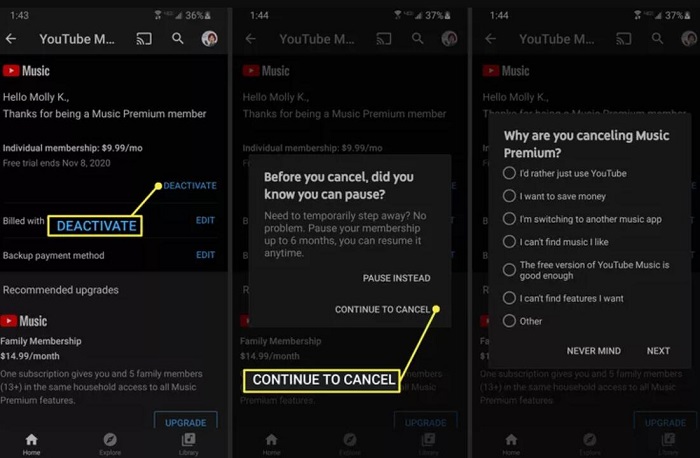
Once you confirm the cancellation, your subscription will be terminated. You will retain your membership benefits until the end of the current billing period.
Part 3. Cancel YouTube Music Subscription on an iPad or iPhone
1) If you subscribed through Apple, you can directly cancel your paid membership from your Apple account. Follow these steps:
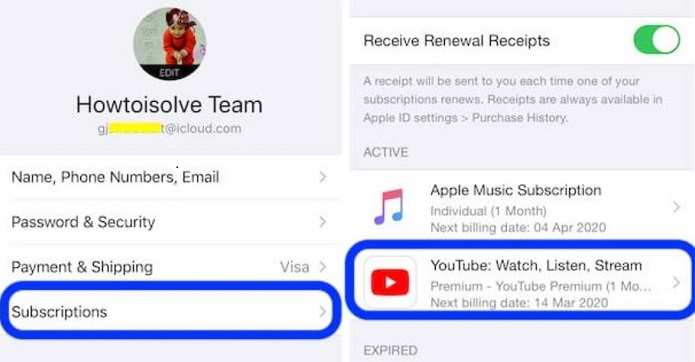
Step 1. On your iPhone or iPad, open the Settings app. Tap on your Apple ID at the top.
Step 2. Within your Apple ID page, select “Subscriptions.” Scroll down and find “YouTube Music.”
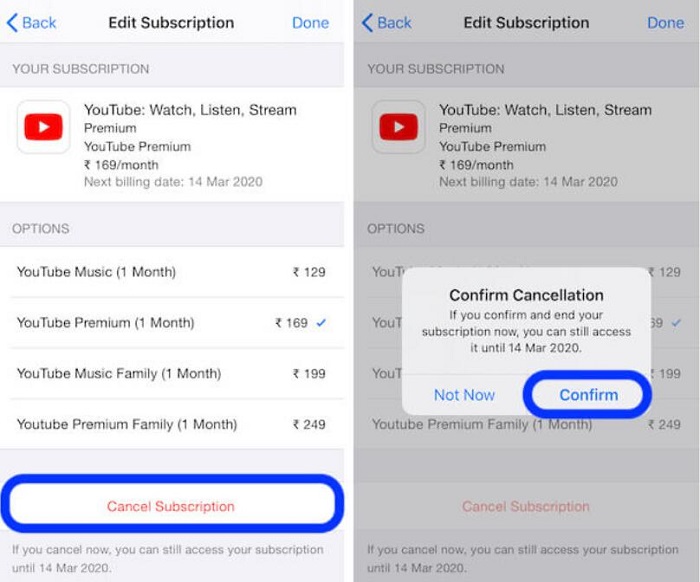
Step 3. Tap on “Cancel Subscription” and confirm your choice by tapping “Confirm.”
2) If you subscribed through YouTube itself, you can cancel your YouTube Music Premium subscription on your iPhone using the following steps:
Step 1. Open the YouTube Music app on your iPhone or iPad and sign in to your account. Tap on your profile photo, then select “Paid memberships.”
Step 2. Choose the membership you wish to cancel. Tap on “Manage Apple Subscriptions.”
Step 3. Within the Apple Subscriptions section, tap on your membership and select “Cancel.”
Upon canceling your membership, you will not be charged again unless you decide to resubscribe. Your YouTube paid member benefits will remain active until the end of the current billing period.
Part 4. Best Way to Retain Offline Playback for YouTube Music after Subscription
When your YouTube Music subscription expires, you will revert to the ad-supported free version, and any downloaded music songs will no longer be accessible. To retain all your downloaded content and continue playback, we highly recommend using 4kFinder YouTube Music Converter.
This powerful tool enables you to download songs from YouTube Music to your local computer, preserving the original audio quality. As a result, even after canceling your subscription, you can still enjoy offline playback of the downloaded YouTube Music songs. Additionally, 4kFinder YouTube Music Converter allows you to download YouTube Music songs, albums, and playlists using a YouTube Music Free account. In other words, you can download YouTube Music for offline listening without needing a YouTube Music Premium subscription.
Furthermore, 4kFinder YouTube Music Converter supports converting YouTube Music to popular audio formats such as MP3, M4A, AAC, WAV, FLAC, and AIFF. It ensures that the essential ID3 tags like Title, Artist, and Artwork are preserved, enabling you to enjoy YouTube Music offline on any device without requiring a subscription.
Key Features of 4kFinder YouTube Music Converter
- Support YouTube Music Free & Premium account.
- Download tracks/albums/playlists from YouTube Music.
- Convert YouTube Music to MP3, M4A, AAC, WAV, FLAC and AIFF.
- Support batch download at 10x faster conversion speed.
- Preserve high output quality.
- retain ID3 tag information after the conversion process.
- Download YouTube Music directly to your computer, MP3 player, iPod and more.
Tutorial: How to Download YouTube Music without Subscription
In the following section, you will learn how to download songs from YouTube Music without a subscription using the 4kFinder YouTube Music Converter. This method is applicable for both Windows and Mac computers. The guide provided below focuses on the Windows version.
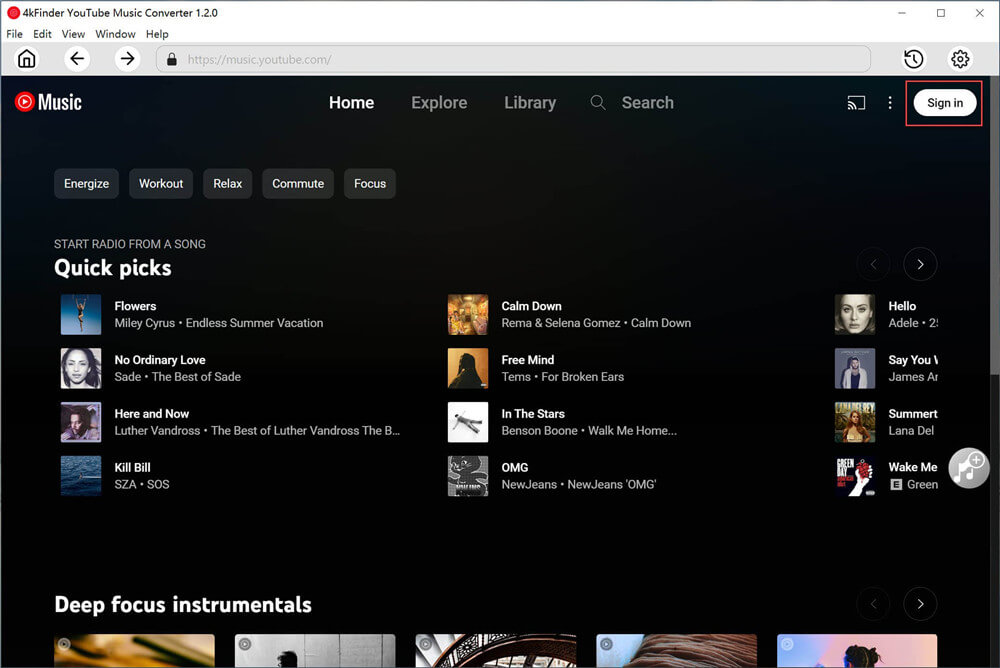
Step 1. Launch and Login
To begin, download, install, and launch the 4kFinder YouTube Music Converter on your computer. Whether you have a YouTube Music Premium subscription or you are a Free user, you can sign in to the built-in YouTube Music web player.
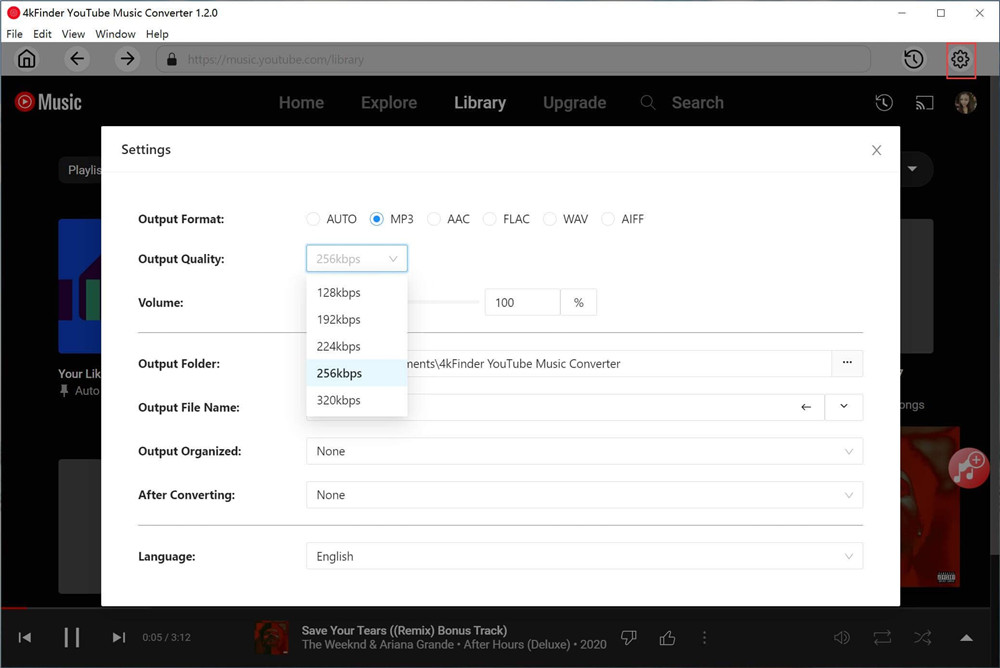
Step 2. Adjust Output Settings
In the top right corner, click on the “Settings” icon. From there, you can select the desired output format such as MP3, M4A, AAC, WAV, FLAC or AIFF. Additionally, you can modify other parameters including quality and output folder.
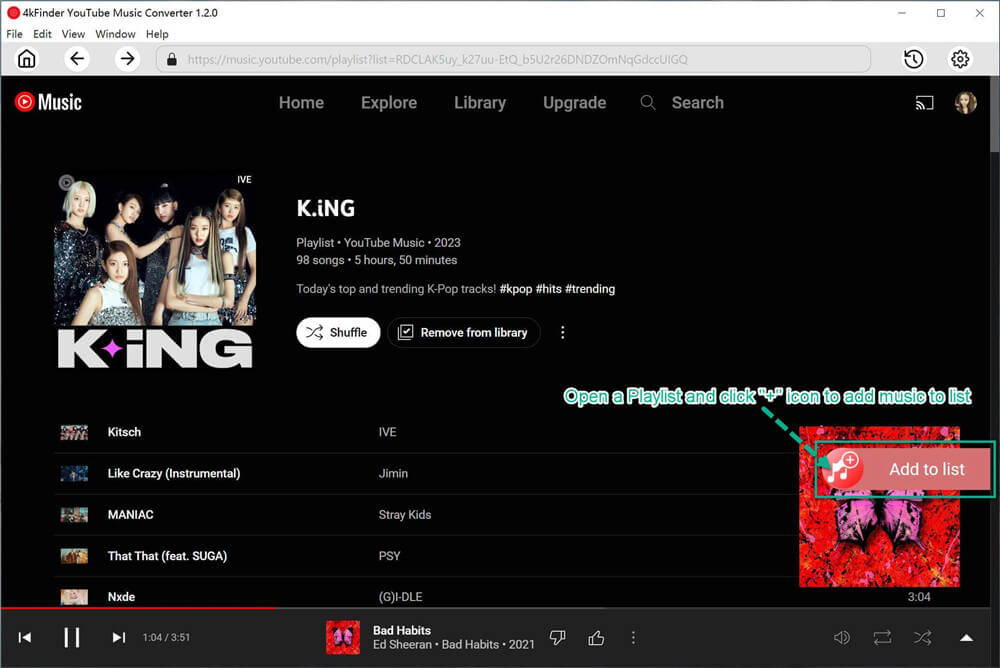
Step 3. Choose YouTube Music Tracks/Playlists
Open your preferred playlist and click on the “+” button located on the right side to add the playlist for conversion and download.
You can select specific tracks that you wish to download.
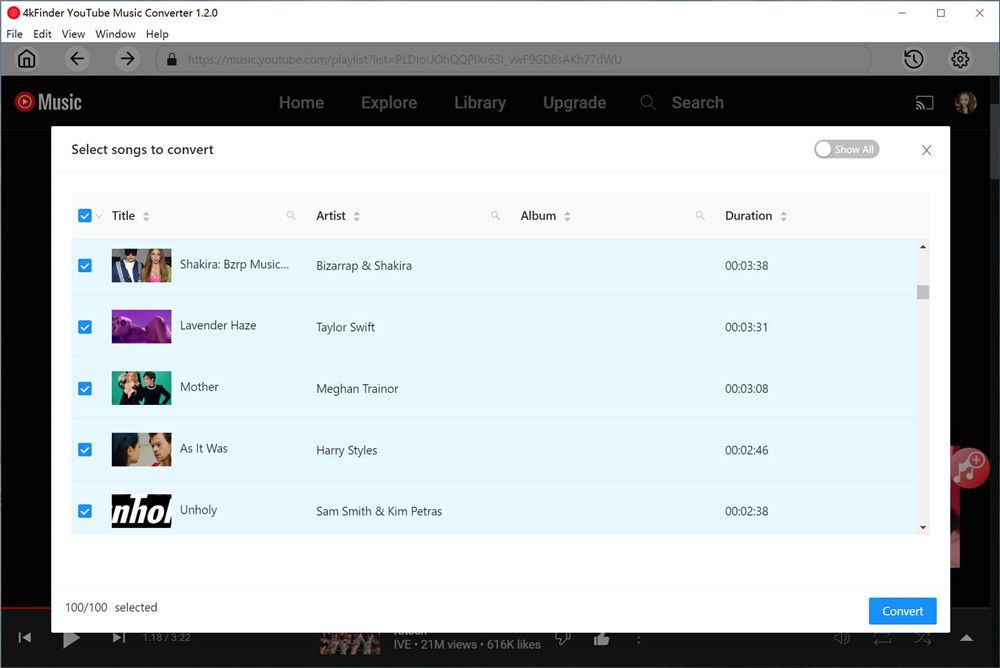
Step 4. Initiate YouTube Music Song Download
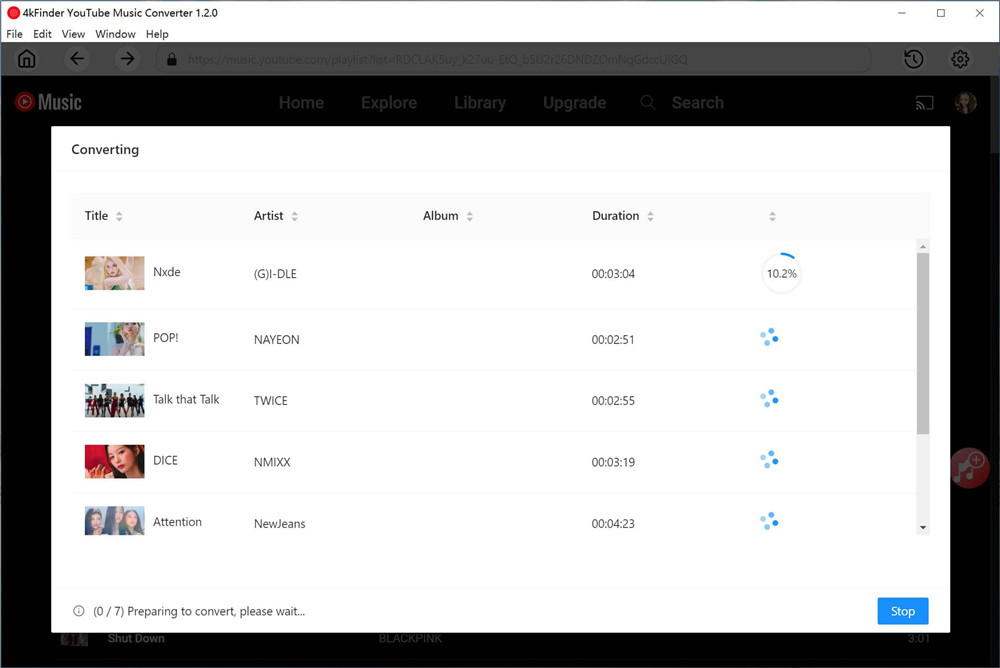
Once all the necessary settings are adjusted, simply click on the “Convert” button to start downloading the YouTube Music songs and playlists.
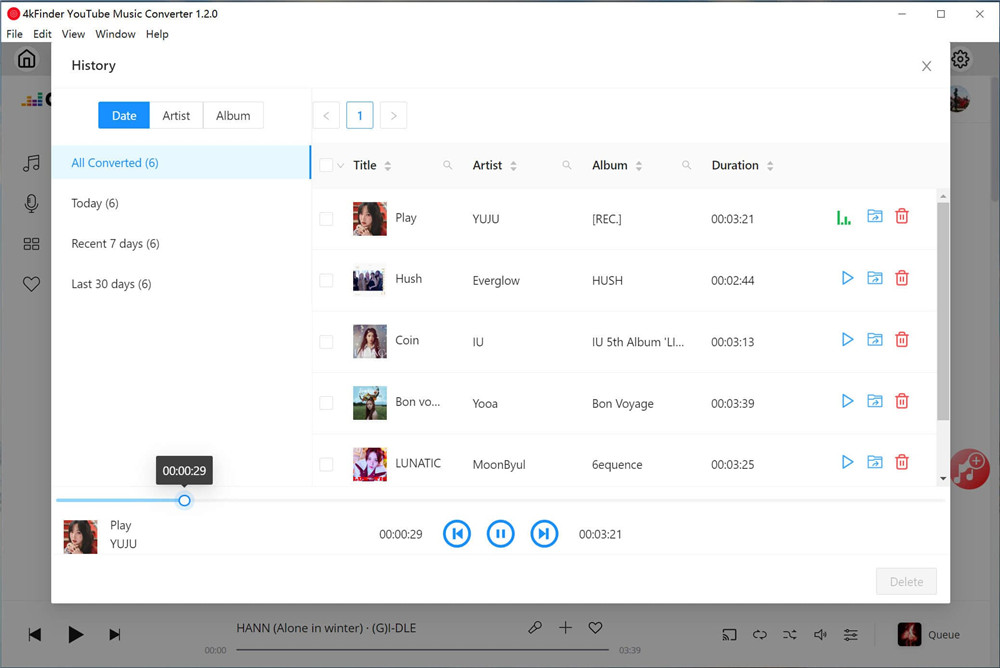
Step 5. Find Converted YouTube Music
After the downloading process is complete, access the “History” option to find the downloaded YouTube Music songs. They will be saved in your local folder. You can then enjoy these downloaded songs offline even after canceling your YouTube Music subscription.
Conclusion
Canceling your YouTube Music subscription is a simple process. However, it’s important to note that when your subscription expires, you will lose access to your downloaded songs. Fortunately, with the help of 4kFinder YouTube Music Converter, you can download YouTube Music songs directly to your local folder. This allows you to keep these songs forever, even without a YouTube Music Premium subscription.